Frustrated by a malfunctioning underground dog fence? Your furry friend’s newfound freedom might point to a break in the wire. This comprehensive guide provides everything you need to locate and repair that elusive break, saving you time, money, and the headache of chasing your escaped pet. From using a wire locator to understanding signal strength and common break points, we’ll walk you through the process step-by-step, empowering you to restore your fence’s integrity and keep your dog safely contained.
Dogs possess naughty adventurous souls which impel them to do things Underground dog fence wire is the perfect option for all dog lovers who are not only conscious about their pet’s containment but also don’t want to compromise on the house’s appeal. Imagine absurd your front patio look if it has countless muddy paw prints.
Unlike the traditional fence wire, the invisible fence doesn’t make your home look like a prison nor make your pet feel like a prisoner in it. Instead, the underground dog fence wire only uses psychological correction; either by beeps or other sorts of gentle deterring methods such as a subtle static shock or a mild citronella puff.
The flawless system of loop, transmitter, and collar keeps your pet aware of your house boundary line, so he won’t get out of it to play with strays or invade the neighboring properties. However, although the loop is buried 1-3 inches down the ground’s surface, it still can damage or break. The simplest causes of the wire break are heavy traffic, weed whacking, gardening, edging, and rodents.
Given these causes, it’s nearly impossible to prevent wire breaks, and the cherry on top is that if once, even a small piece of the best wireless dog fence gets damaged, the system stops working properly. Why? To understand this, let’s go through a quick overview of how invisible dog fence work.
How Does an Underground Fence Work?
The invisible fence system consists of three major components as follows:
- The radio transmitter
- The wire underground
- The receiver that mostly comes with a collar
The transmitter needs to be connected to a power source, after which it starts transmitting radio signals through the entire buried wire, which, in turn, acts as an antenna to catch radio signals and transmit them to the other end. The wire is mostly insulated, so the users can lay it around swimming pools and vegetable gardens too.
However, the wire needs to stay 3-24 inches beneath the ground surface – If too high, someone may tip over it, and if too down, the intensity of signals will be compromised.
Whereas the receiver act as a detector, so whenever your dog comes close to the wire underground, it catches the signals the wire is transmitting, and the correction system wakes up. Since the transmitter uses only a very small power voltage, the radio signal it transmits is also not of too high intensity, which in turn makes the receiver catch signals only at a short range.
So, whenever the wire breaks, it stops transmitting the radio signal from transmitter to receiver properly. Resultantly, when your dog comes close to the boundary region, his receiver doesn’t induce any correction.
However, the good news is the broken wire can be fixed if it’s of good quality. But, before fixation, you need to locate the break in the wire, which is, undoubtedly, a very daunting task but not impossible.
Keep reading to know about the quickest and easiest ways to find a break in the electric dog fences, so you don’t have to waste your whole weekend, digging your yard out or searching for affordable help!
How to Find a Break in an Invisible fence?
You can follow the simple steps given to determine if there is a break in the fence.
1. Examining Uncovered Ground Wires
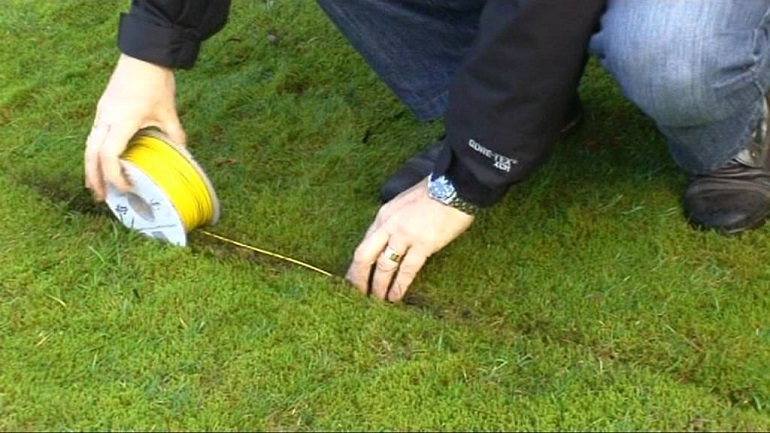
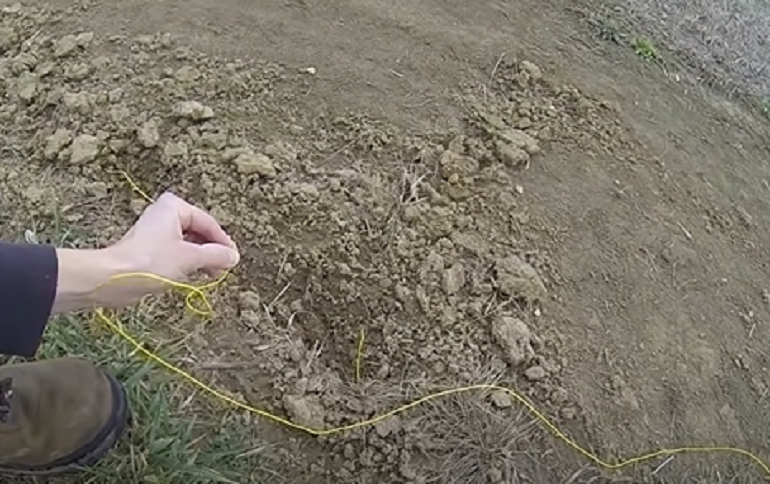
The best point to start with is visual inspection; finding the break in the wire with your eyes before moving to complicated methods. If you marked the whole boundary before burying the wire, spotting a breakage will be much easier since you’d be more than sure about the precise location where your electrical wires are lying.
Other things you can do to simplify the whole process are as follows:
Ways to Find a Break by Visual Inspection
Start with the most common places that are more prone to damage, for example, the freshly mowed, plowed, or tilled region, the area that welcomes heavy foot or vehicle traffic, or the garden beds where you’ve recently sown the seeds or plucked out the veggies.
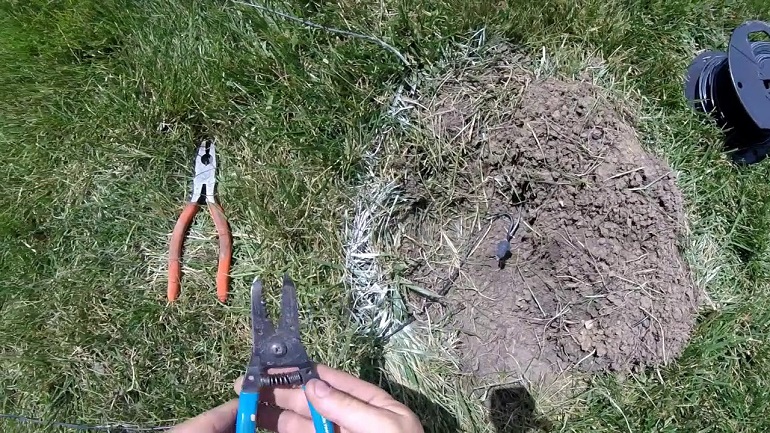
- Besides, also look for the holes, made by rodents, rabbits, or other burrowing animals since it’s also a clear tell-tale sign that someone has tried to tamper with your dog fence.
- Once detected such an area, showing signs of recent fiddling, dig out the buried wire and walk the whole perimeter while trying to spot the damage, either in the form of fraying, splitting, etc. Doing so could take several hours, but it’s the simplest yet most effective method to find the broken wire, without professional help or advanced tools.
- Besides hunting for visible damages, you should also tug the wire gently to check for loose ends. Similarly, try to check for the break in the part of the wire which you first found above the ground.
2. Performing a Short Loop Test
So you couldn’t find damage by visual and physical check, and your transmitter is still beeping madly, indicating a breakage?
Well, sometimes, it’s not the wire but the transmitter which is working incorrectly, so before you opt for more time and energy-consuming methods to find a break in the wire, we’d advise you to make sure that the problem is actually in the wire. And for this purpose, nothing is better than a short loop test.
Just follow the given steps, and you’re done!
Making a Short Loop
Start with analyzing the transmitter, and you’d find two wires coming into the transmitter through two checkpoints. Disconnect both wires, which will shut the transmitter beeping up.
- Get a paper clip or a full-length test wire and connect it to the checkpoints from where you just have disconnected wires.
- If the transmitter again starts to scream, it means the problem is not with the wire. Whereas, if the transmitter doesn’t make any sound after getting connected with the test wire, it means there’s a break in the wire.
3. Scanning For a Break Using Radio Signals
After ensuring about the wire break, if you still don’t want to dig the entire yard out to locate the breakage, then it’s okay since we have an alternate way – The wire break locator.
Using this method, you can detect a break located in the underground fence wire, from the ground surface. For this, all you need to do is to follow some simple steps as follows;
Change the Transmitter Setting
First of all, unplug the transmitter from the control box and change its setting from FM to AM. By doing so, your transmitter will begin sending the low-frequency radio signals to the invisible fences, instead of a strong single.
Connect an RF Choke
After changing the setting, disconnect the two wires from the transmitter and connect those wires with the leads of the RF choke. Once done, connect the whole wires that are now joined to an rf choke too, with the transmitter. Plug the transmitter into the power board and turn the system on.
Get an Am Radio to Locate the BreakNow it’s time to pull your old AM radio out and set it to the lowest AM setting so it can detect the radio signals coming from the transmitter. Once radio tuned, go outside in your yard and walk the entire perimeter. The point where radio systems stop working and don’t catch any signal around four to five feet will indicate the line break.
So, just tug the wire gently, and on finding a loose end, dig the ground to fix the breakage. However, before digging, we’d advise you to double-check the breakage using the wire locator system.
4. Testing Wire Continuity with a Multi-Meter
Multimeters are simple to use digital meters that mainly work to measure the small electrical values in different units like the voltage, resistance, current, etc. Using this method, one may figure out whether the damage is in the wire or any other part of the system.
To use these meters to locate a break in your invisible fence, you just need to follow the given steps;
Change the Meter Setting
You need to start by changing the meter setting, which is quite simple. All you need to do is search for a speaker icon, and your multimeter will be set on continuity setting.
Connect Meter Box with Dog Fence Wire
Now, connect the two metal legs of the meter with the twisted wires of your fencing system. After this, try to hear the beep since if the meter will beep, it means your wire is not broken, and the error is somewhere else and vice versa.
How to Join and Repair Electric Dog Fence Wire?
So now, that you’ve located the breakage, it’s time to fix it so you can once again live like other carefree dog owners. To fix the break, all you need to do is to follow the given simple steps:
Strip the Coating
Dig out the two broken ends and strip their insulating coating until the inner copper is exposed. For this, you may use a general plier or wire stripper. Remember that you need to strip each end to one to two inches. If the wire is short, you can extend the length by adding a new wire between the joining ends.
Twist the Stripped Wires Around Each Other
Once stripped, butterfly twist the frayed copper leads of both wires around themselves. Once done, overlap both the wire around each other by butterfly twisting. After you feel like both the joining wires, have twisted tightly around each other, tie a knot in the end, to make a solid connection and avoid wire breaks in the future, from the very same point.
Cover the Joined Ends with a Tape
In the end, cover the stripped surface with several layers of electric tape so they won’t transmit intermittent signals nor get disjoined on tugging. Another way to secure the joined ends is by using a waterproof capsule or splice. These capsules come with a protective, hydrophobic gel that keeps the moisture from penetrating.
Final Thoughts
There is no doubt that finding a break in a huge invisible fence wire is no less than finding a needle in a haystack, but if you know the right methods and employ the appropriate strategy, the whole process becomes much easier.
However, we’d suggest never trying to fix the break yourself unless you are experienced enough. Otherwise, you might end up ruining the whole dog fence wire system while trying to save a few bucks!
Locating a break in your underground dog fence requires patience and methodical troubleshooting. By utilizing visual inspection, a wire break locator, or a tone generator, you can pinpoint the damaged section. Remember to check common problem areas like gate entrances, areas of landscaping, and sharp turns in the wire. Properly repairing the break with waterproof connectors and burial ensures your pet’s continued safety and containment. Regularly inspecting your fence can prevent future breaks and maintain the effectiveness of your invisible boundary.


